Showing posts with label SocialNetworking. Show all posts

Aug 19, 2013

News feeds not working in SharePoint 2013 - microsoft.office.server.microfeed.microfeedexception

To know about Micro Blogging in SharePoint 2013, read this post.

When I tried to use the News Feed Feature in SharePoint 2013, it thrown exception:
microsoft.office.server.microfeed.microfeedexception
The below is the screenshot: 
 Solution:
As I mentioned in the earlier post about Micro blogging in SharePoint 2013, news feeds are related to User Profile Service.
Hence, we have to check two things which are related to User Profile Service in SharePoint 2013.
    1.   Check whether AppFabric Caching service is running with the service account which has elevated permissions. 

   2.   Next, check the account which is running the User Profile Service application:
     Open Central Administration -> Mange Service Applications -> User Profile S    Service is started and also check the permissions for the service
    
   Click on the User Profile service and in the permission section in the ribbon check whether the service account running this service has full control. 


 If all the above scenarios are properly configured in SharePoint farm, then the news feed will work properly as expected.
Feel free to comment and share this post if this helps you.

Aug 17, 2013

Micro blogging in SharePoint 2013

Introduction:
Microsoft has introduced a new social feature called “Micro blogging” in SharePoint 2013 to enhance the social networking and collaboration features.
This powerful feature is added as an OOTB web part to SharePoint 2013 and ready to useJ

So, what is micro blogging?
It is a type of blog which allows users to share their updates. This updates are called micro posts and the use of this services is called micro blogging.
Ref: http://www.webopedia.com/TERM/M/microblog.html

Micro blogging in SharePoint 2013
The SharePoint Micro Blogging feature is like Facebook and Twitter which allows the users to communicate with others easily, by posting some questions, responding, comments and etc.
Following are the list of features:
  Ø  Update picture and links in the posts and replies
  Ø  Participate in a conversation by posting comments (with rich media and
        Links in the post) and replied
  Ø  Use mentions (@) to tag a user in  a post and in the replies
  Ø  Use tags (#) to define keywords so that the users can follow and search for   the same topic easily
  Ø  Like a post, follow people, documents, sites and tags

   Also, the author’s (one who posts an update or comment or reply for a post)
   presence (online, off-line, busy, in a meeting) are also displayed.

Add the Site Feed web part to the page:
Edit the page -> Insert -> Web part -> Social Collaboration -> Site Feed
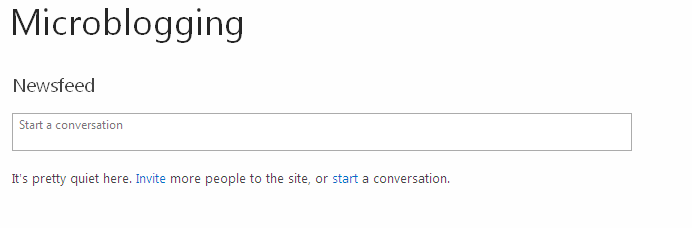
 Once added, you will see a dialogue to post your feeds as shown below:
Add a new Post in the Micro blog:
You can add a post by typing your post in the text box and hit post to update your post
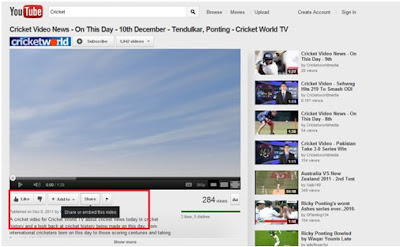
Add Rich Media & Links, Delete a Post:

In the Post you can add Rich media such as Image, Video, Links, etc.. Also, you have options of deleting  the post.
Like, Reply, Copy Link to conversation, Follow up, Lock Conversation:
Like other social networking as I mentioned earlier in this post you have options of Like, Reply, Copy Link to Conversation, Follow up and Lock a Conversation :)
Also, there is an option "Show More Posts" to view the old posts.

Tagging a User and Topic
The options of Tagging a user by "@" allows the other user to specifically tag a post to a user and also Tagging a topic by "#" allows the posts to be categorized and also it helps in searching the posts easier.

 See where the Micro blog contents are stored?
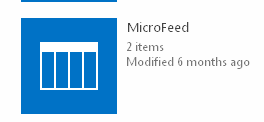
This micro feed are based upon the User Profile Service in SharePoint. This feeds are stored in a list called Micro Feed by default where you will see all the details stored.
Navigate to the following path to view the Micro Feeds:
Check for the Micro Feed List
Clicking on the List, you will see a List with different columns which stores the feeds.

Hope you enjoyed the post. Feel free to share your valuable comments which always make me to write more. Also share this post to your friends if it is helpful. 

Dec 12, 2011

Embedding YouTube Videos to the SharePoint Site

Steps
1.  Go to the YouTube site and navigate to the video which you like to embed in the SharePoint Application.
2.  Click on Share button below the video as shown below


3. On clicking Share you will find two options as Mail or Embed as shown below


4.  Copy the code from the Embed option as show above and save it in a notepad. I named it as youtubetest.txt
Code example in my case
<iframe width="560" height="315" src="http://www.youtube.com/embed/6986O9VA6LU" frameborder="0" allowfullscreen></iframe>
5. Upload the text file to SharePoint Document Library and right click on the file and
copy the shortcut from it.
6.  Now go to the SharePoint page where you like to add the YouTube video and edit 
the page.
7. Click insert a web part -> add a Content Editor web part 
8. Edit the web part and now add the shortcut of the youtubetest.txt path in the Content Link property of the web part or you can directly add the code which is copied from the YouTube site in the Source Editor property of the web part and save it.
You will get the following result.


You can place this web part in the Home Page of your SharePoint site.
Enjoy!

Dec 11, 2011

Twitter WebPart for SharePoint

I have already posted a link which will guide you in creating the twitter and Face book web parts for SharePoint in this article. Twitter and FaceBook for SharePoint. Have a look at this.
Yet another easiest way for twitter is as follows:
Steps:
1. Open the site page where you want to add the twitter widgets.
2. Add a Content Editor Web part.
3. Now open this URL in your browser
4. You will find 4 widgets (in the Widgets for my site option) which is provided by default in the Twitter Official Site
·                      Profile Widget
·                     Search Widget
·                     Faves Widget
·                     List Widget
5. All the information about the widgets will be given the site.
6. Now for example I will add the SEARCH WIDGET to our site. I click on Search Widget which will navigate to this link
7. You have 4 options such as Settings, Preferences, Appearance and Dimensions.
8. Here you can customize everything and my sample is shown code grabbed from the site is shown below.
<script src="http://widgets.twimg.com/j/2/widget.js">
</script>
<script>
new TWTR.Widget({
  version: 2,
  type: 'search',
  search: 'SharePoint',
  interval: 30000,
  title: 'What people are saying about',
  subject: 'SharePoint',
  width: 250,
  height: 300,
  theme: {
    shell: {
      background: '#8ec1da',
      color: '#ffffff'
    },
    tweets: {
      background: '#ffffff',
      color: '#444444',
      links: '#1985b5'
    }
  },
  features: {
    scrollbar: false,
    loop: true,
    live: true,
    hashtags: true,
    timestamp: true,
    avatars: true,
    toptweets: true,
    behavior: 'default'
  }
}).render().start();
</script>

9. That’s it!! Add this code in the Source Editor of the Content Editor Web Part.
10. This will display all the tweets with respect to the Query you gave in the Search. The webpart will look like this.


11. Save it!! Enjoy the Twitter integration in your SharePoint Site.

Dec 9, 2011

Integrating Twitter and FaceBook in SharePoint

I would like to share the link which is very simple and clear way of integrating the twitter and facebook in SharePoint.

Twitter Integration


Face Book Integration